Paypal is a global online payment processor which has over 230 million users in 203 countries, arguably the largest and most accepted payment gateway in the world. Paypal has long being the nightmare of Nigerian internet marketers, bloggers, affiliate programs and the general market at large.
Starting from yesterday, 17 June, 2014 Nigerians will be eligible to sign up for a free Paypal accounts legally. No change of IP is required – just come the way you are!
In four easy steps, I will guide you on how to setup and verify your very own Paypal account right from your computer, right now!
Requirements
To get started, make sure you have a working PC/Mac that can access the internet, a reliable browser; any of Firefox or Google Chrome will do just fine and finally, make sure you are not accessing the web through a different location (other than Nigeria) or through a proxy connection.

Step 1 – Getting Started
Simply hop in to www.paypal.com, you can type that to your browser address bar or simple click on the link from here. Follow the Sign Up link, that should land you to a page similar to the image you are looking at above. Now, if for some reasons your country or region isn’t set to Nigeria, kindly select Nigeria from the select menu.
When your country or region is set, choose an account type that best suit your online transaction. You can choose from either Individual or Business account. So, I will go ahead and click Open an account from the Individual box.
** To open a business account you will need to provide information such as your business name, business address and type of business.

Step 2 – Tell Paypal about yourself
If you did the right thing, you should be seeing a page requesting your information in front of your screen. Kindly fill the form with your original details and click Agree and Create Account button just at the footer of the form.
Step 3 – Verify that you are a Human
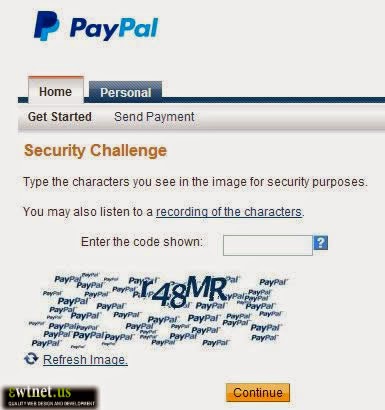
In this page you have to re-assure Paypal that you are a human being by entering the code on that page into the small box right-top of the code. You have to type this code exactly the way it appeared on that page. When done, click continue to finally setup your account.
The next page will bring up a form to enter your card details. We will have to skip that part for now. So simply click Go to My Account and enjoy the feel of your brand new Paypal account.
Right now, your Paypal account is as useless as not having a Paypal account. So you may want to go right to you email inbox, locate and open the “Welcome to PayPal ” email sent to you by Paypal (Note: This can never be in your spam folder, beware of phishing links) and click on the Link Now button. Enter your Paypal password (The one you used on the registration page) on the next page and hit Verify Email to proceed and add your card.
Step 4 – Verify your Paypal Account
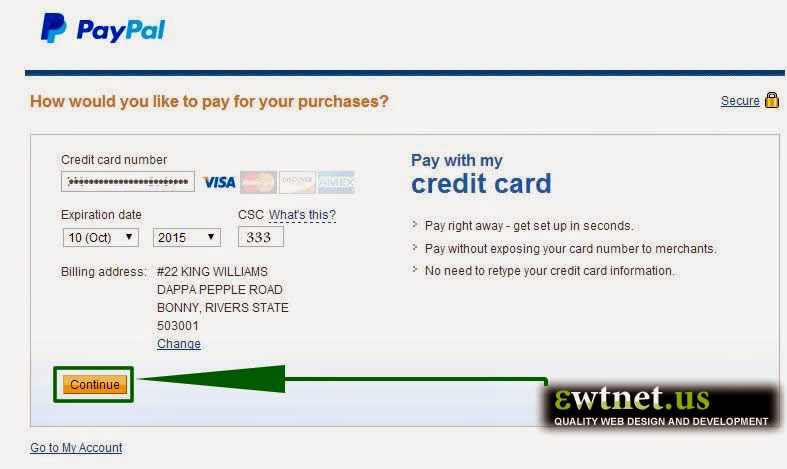
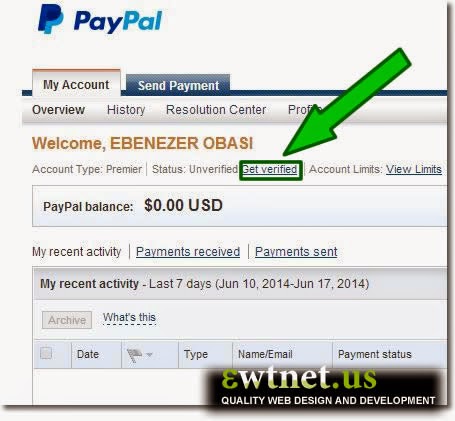
To verify your account, kindly go to your Paypal account dashboard and click on the Get Verified Link just below your name.
Enter your card details in the next page and hit the Continue button. After you click Continue, Paypal will charge the card $1.95 USD to make sure it’s yours. This fee will be refunded to you within 24 hours from the time your card has been confirmed.
Could it be more easier? I doubt it! Try it out and share your experiences on the comment section.