23 C
New York
Sunday, July 6, 2025
Home Blog Page 5

Transform Your Space with Stunning Aesthetic Wallpaper

0

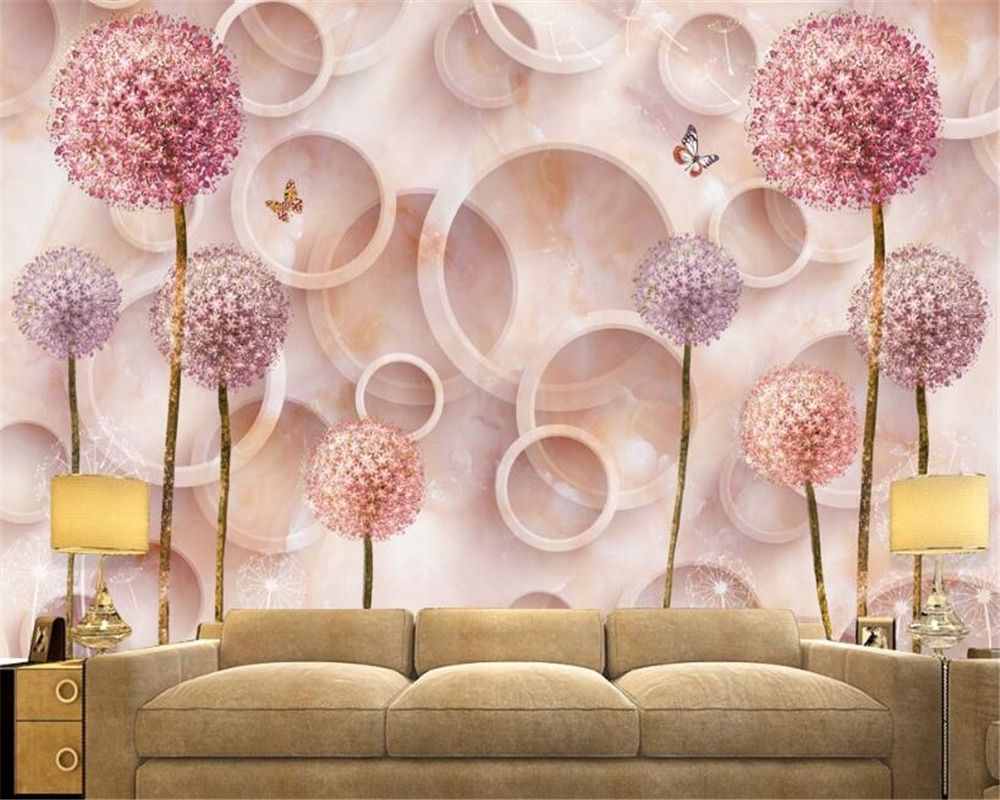
Aesthetic wallpapers are wallpapers that are visually appealing and pleasing to the eye. They typically feature beautiful and striking images, patterns, colors, or graphics that create a particular mood or atmosphere. Aesthetic wallpaper can be of different styles, such as vintage, minimalist, abstract, nature-inspired, or modern. They are often used to decorate desktops, phone screens, or social media profiles and are popular among people who value beauty, art, and design. Aesthetic wallpapers can also reflect the personality or interests of the user and serve as a form of self-expression.

Tips to get you started with aesthetic wallpapers

Transforming your space with aesthetic wallpapers is a great way to add a touch of style, color, and personality to your home or office. Here are some tips to help you get started:

  1. Choose the Right Wallpaper: The first step in transforming your space with aesthetic wallpapers is to choose the right wallpaper. Look for designs that match your personal taste and complement your existing decor. Consider the size of the room, the amount of natural light, and the overall mood you want to create.
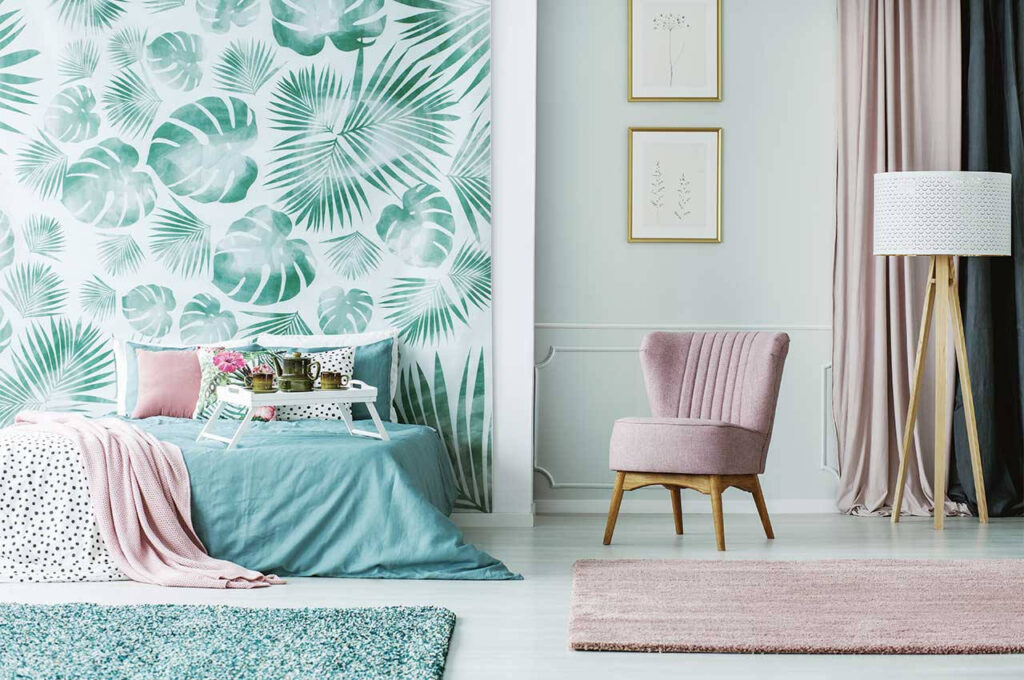
  2. Create a Focal Point: Use your aesthetic wallpaper to create a focal point in the room. This could be a statement wall or a feature area such as a fireplace or a bookshelf. Choose a wallpaper design that draws attention and enhances the beauty of the space.
  3. Coordinate with Furniture and Accessories: Coordinate your aesthetic wallpaper with the furniture and accessories in the room. Choose colors and patterns that complement each other and create a cohesive look. For example, if you have a neutral-colored sofa, choose a wallpaper design with a bold pattern or bright color to create contrast.
  4. Use Wallpaper in Unexpected Places: Aesthetic wallpapers can be used in unexpected places to create a unique look. Consider using wallpaper on the ceiling, inside bookshelves, or as a backdrop for artwork or photographs.
  5. Don’t Be Afraid to Mix and Match: Aesthetic wallpapers can be mixed and matched to create a layered, textured look. Combine different patterns, colors, and textures to create a unique and interesting space.

More tips:

  1. Consider the Material: Aesthetic wallpapers are available in various materials, such as vinyl, paper, fabric, or grasscloth. Each material has its own benefits and drawbacks, so consider the room’s function and the amount of traffic it receives before choosing the material.
  2. Create a Theme: Aesthetic wallpapers can help create a theme for a room, such as a nature-inspired wallpaper for a bedroom or a geometric wallpaper for a modern living room. Choose a design that reflects the theme you want to create and use it as a starting point for the room’s decor.
  3. Experiment with Different Patterns: Aesthetic wallpapers are available in various patterns, from florals and stripes to geometric shapes and abstract designs. Experiment with different patterns to create a unique and visually appealing space. You can also mix and match patterns for a layered look.
  4. Use Wallpaper to divide a space: If you have an open-concept living space, you can use aesthetic wallpapers to divide the space and create different zones. For example, you can use a wallpaper with a bold pattern to define the dining area or a wallpaper with a calming color to create a relaxing reading nook.
  5. Install the Wallpaper Properly: Proper installation of aesthetic wallpapers is crucial to ensure that the wallpaper lasts and looks great. Follow the manufacturer’s instructions carefully or hire a professional wallpaper installer to ensure a smooth and flawless installation.

By considering these tips, you can transform your space with stunning aesthetic wallpapers and create a beautiful and personalized environment that reflects your unique style and taste.

Clean and Refreshing: Why Water Distillation is Worth It

Water distill is a process of purifying water through evaporation and condensation. In this process, water is heated to its boiling point to create steam, which is then cooled and condensed back into a liquid form. The resulting water is free from impurities such as minerals, salts, bacteria, and other contaminants that may be present in the original water.

The process of water distillation involves the use of a distillation unit, which typically consists of a boiling chamber, a condenser, and a collection vessel. Water is heated in the boiling chamber, and the resulting steam rises and enters the condenser. The condenser cools the steam, causing it to condense back into liquid form and collect in the collection vessel.

Water distillation is a highly effective method of water purification and is commonly used in industrial and laboratory settings. It is also used in households as a means of producing high-quality drinking water. However, it should be noted that the process of distill can be energy-intensive, and it may not be practical for large-scale water treatment operations. Additionally, some contaminants, such as volatile organic compounds, may not be completely removed through distillation alone, and additional treatment steps may be required.

Applications of distilled water

Water distillation is a versatile method of water purification that has numerous applications in various fields. Here are some of the advantages of water distill in different contexts:

  • Household use: Distilled water is an excellent option for drinking, cooking, and brewing coffee and tea, as it produces a clean, clear, and tasteless water. It is also useful for humidifiers, steam irons, and other appliances that require mineral-free water to prevent mineral buildup.
  • Laboratory use: Distilled water is an essential component in various laboratory applications, such as preparing solutions, conducting experiments, and cleaning laboratory equipment. The absence of impurities in distilled water ensures that laboratory results are accurate and reliable.
  • Industrial use: Distilled water is used in various industrial applications, such as power generation, pharmaceutical manufacturing, and electronics manufacturing. The absence of impurities in distilled water ensures that the final product is of high quality and meets the required standards.
  • Medical use: Distilled water is used in various medical applications, such as sterilizing medical equipment, preparing intravenous fluids, and wound care. The absence of impurities in distilled water ensures that medical procedures are safe and effective.
  • Agriculture use: Distilled water is used in hydroponic farming, a method of growing plants without soil. Distilled water ensures that the plants receive only the nutrients required for growth, and the absence of impurities eliminates the risk of mineral buildup in the growing medium.
  • Removes heavy metals: Water distill is an effective method of removing heavy metals, such as lead and mercury, from drinking water. These metals can be harmful to human health if consumed in high concentrations, and distillation provides a safe and effective way to remove them.
  • Reduces water hardness: Distillation also removes minerals, such as calcium and magnesium, which contribute to water hardness. Hard water can cause problems such as mineral buildup in pipes and appliances, reduced effectiveness of soaps and detergents, and can even damage water-using appliances. Distillation eliminates these problems by producing soft, mineral-free water.
  • Removes volatile organic compounds (VOCs): VOCs are chemicals that can be harmful to human health and the environment. They are commonly found in industrial waste, pesticides, and household cleaners. Distillation is an effective method of removing these contaminants from water.
  • Long-term cost savings: Although the initial setup cost of a distillation unit can be high, it can be cost-effective in the long run. Distilled water eliminates the need for bottled water, water filters, and water softeners, which can add up to significant cost savings over time.
  • Sustainable option: Water distillation is a sustainable option for water purification, as it does not produce wastewater or require the use of chemicals. It also conserves water by producing high-quality water that can be used repeatedly without the need for further treatment.

Advantages of water distillation

In summary, water distillation is worth it for several reasons. Firstly, it is a highly effective method of water purification, capable of removing a wide range of contaminants, including minerals, salts, bacteria, and other impurities. This makes it ideal for producing high-quality drinking water, particularly in areas where access to safe drinking water may be limited.

Secondly, water distillation produces water that is free from chemical additives, making it a natural and environmentally friendly option. Distilled water is also free from minerals, which can be beneficial for certain applications such as laboratory testing, as it eliminates potential interference from impurities in the water.

Thirdly, water distillation is a reliable and consistent method of water purification, producing consistent results every time it is used. This makes it ideal for use in industrial and laboratory settings, where consistent and reliable water quality is essential.

Finally, while water distillation can be energy-intensive, it can be a cost-effective option in the long run, particularly in areas where water treatment infrastructure is limited. Once the distillation unit is set up, it requires minimal maintenance and can produce high-quality water for years to come.

Overall, water distillation is a reliable and effective method of water purification that can produce high-quality water free from impurities, making it worth considering for various applications.

Streamline Your Security with Certificate Authority Management

In today’s digital world, organizations depend on a wide range of applications and services to run their businesses. With too many digital assets, managing and securing them can be a daunting task. This is where Certificate Authority (CA) management comes into play. CA management assists organizations specialize their security. This is done by providing a centralized platform for managing digital certificates and securing their digital assets. Read further to learn how to streamline your security with certificate authority management. 

man pointing laptop computer
Photo by LinkedIn Sales Navigator on Pexels.com

Digital Certificates in Certificate Authority Management 

Digital certificates provided by Certificate Authorities (CAs) can help businesses develop their security posture by providing authentication, encryption, and data integrity. Businesses should also consider using key management services offered by reputable CAs. This will help manage their private keys more safely. Additionally, SSL/TLS certificates authenticate the identity of the website. This provides assurance to users that they are communicating with a legitimate entity. Businesses should also monitor their digital certificates often to ensure that they are still valid. They can be sure that they have not been tampered with.

Function of Certificate Authority Management 

To Verify the Identity of the subject

The main function of a CA is to verify the identity of the entity asking for a digital certificate, also known as the certificate subject. This process, known as authentication or validation, involves verifying the identity of the subject and ensuring that they have the right to use the domain or other information that the certificate covers. Once the subject has been authenticated, the CA will issue a digital certificate that contains information about the subject’s identity, the public key associated with the certificate, and the CA’s digital signature.

To verify Digital Signature

The public key added to the certificate can be used for several purposes. Purposes such as encrypting and decrypting data or verifying digital signatures. When a user visits a website with an SSL/TLS certificate issued by a CA, their web browser uses the public key to establish a secure connection with the website. The digital signature included in the certificate ensures that the certificate is authentic. It also shows that it has not been tampered with.

Revokes Certificate

CAs also revoke certificates when they are no longer valid, such as when a domain name expires or when a private key associated with the certificate is compromised. CAs maintain Certificate Revocation Lists (CRLs). This list contains information about revoked certificates. They are published to see to it that users can check if a certificate is still valid.

Ensuring Communication Security

CAs play a crucial role in ensuring the security of online communication. This is done by providing a trusted means of verifying the identity of digital entities. Although, not all CAs are equal, and some may have higher levels of trust than others. To ensure the authenticity of digital certificates, web browsers and other applications maintain a list of trusted CAs. This is known as the root certificate store. When a user encounters a certificate issued by a CA that is not in the root certificate store, they will be prompted to confirm that they trust the CA before proceeding.

happy ethnic woman sitting at table with laptop
Photo by Andrea Piacquadio on Pexels.com

Here are some ways that Certificate Authority management can help streamline your security:

Centralized Management

CA management creates a centralized platform for managing digital certificates. This makes it seamless for organizations to manage their certificates and ensure that they are up-to-date and properly configured. With centralized management, organizations can quickly and easily deploy certificates across their network. They will be reducing the risk of downtime or security breaches.

Automated Certificate Renewals

Certificates expire after a certain time. When they do, they can cause security issues or downtime for applications and services that depend on them. With Certificate Authority management, organizations can automate the process of getting it back. This is to ensure that certificates are renewed before they expire. This helps prevent security issues and reduces the workload on IT teams.

Visibility and Control

Certificate Authority management provides organizations with visibility and control over their digital certificates. With a centralized dashboard, IT teams can promptly identify expired or improperly configured certificates. Then they can take action to resolve any issues. This helps prevent security breaches and reduces the risk of downtime.

Compliance and Audit Trail

Many industries have compliance regulations that need the use of digital certificates to secure data and communications. With Certificate Authority management, organizations can ensure that they are meeting these compliance requirements. This is through properly managing their digital certificates. Additionally, CA management provides an audit trail that connects all certificate-related activities. Thereby providing an additional layer of security and compliance.

Cost Savings

By streamlining certificate management, organizations can lessen the workload on their IT teams. They will also reduce the risk of downtime and security breaches. This can lead to cost savings by reducing the need for manual intervention and improving the overall efficiency of IT operations.

In Conclusion

Certificate Authority management helps streamline security by providing a centralized platform for managing digital certificates. With automated certificate renewals, visibility and control, compliance and audit trails, and cost savings. CA management is an essential tool for any organization looking to secure its digital assets with the right factors.

Shake Things Up With These Delicious Cocktail Recipes

Are you tired of the same old drinks? Do you want to impress your friends and family with your bartending skills? Look no further because we’ve got you covered with these delicious cocktail recipes that are sure to shake things up! But, let’s make a contrast between a Cocktail and a Mocktail. Shall we?

A cocktail is an alcoholic mixed drink that typically contains three or more ingredients, including a base spirit, a sweetener, and a flavoring agent such as fruit juice or bitters. Cocktails can be served on the rocks, blended with ice, or shaken and strained into a glass.

On the other hand, a mocktail is a non-alcoholic mixed drink that is made with similar ingredients to a cocktail but without the addition of alcohol. Mocktails can be just as delicious and refreshing as cocktails, and are a great option for those who don’t drink alcohol or who are looking for a non-alcoholic alternative.

The main difference between cocktails and mocktails is the presence of alcohol. Cocktails contain alcohol, while mocktails do not. Mocktails can also be made with a wider range of ingredients, as there are no restrictions on the use of alcohol. However, both cocktails and mocktails are typically made using similar techniques and can be just as flavorful and enjoyable when made well.

Well, this article is for those who are interested in delicious amazing cocktail recipes so let’s dig in!

  1. Moscow Mule

The Moscow Mule is a classic cocktail that has been around for decades, but it never goes out of style. To make this refreshing drink, you’ll need vodka, ginger beer, lime juice, and ice. Combine the ingredients in a copper mug and garnish with a lime wedge for a perfect finish.

  1. Margarita

The Margarita is a popular cocktail that is perfect for any occasion. All you need to make this classic drink is tequila, lime juice, triple sec, and ice. Mix the ingredients in a shaker and strain into a salt-rimmed glass for a deliciously tangy experience.

  1. Mojito

The Mojito is a refreshing cocktail that originated in Cuba. To prepare this delicious drink, you’ll need white rum, lime juice, sugar, mint leaves, and club soda. Muddle the mint and sugar in a glass, add the rum and lime juice, and top with club soda for a light and refreshing cocktail.

  1. Old Fashioned

The Old Fashioned is a classic cocktail that has been around since the 1800s. This timeless drink is made up of bourbon or rye whiskey, sugar, bitters, and ice. Stir the ingredients in a glass and garnish with a cherry and orange slice for a sophisticated cocktail.

  1. Cosmopolitan

The Cosmopolitan is a popular cocktail that gained popularity in the 90s. To make this fruity drink, you’ll need vodka, triple sec, lime juice, cranberry juice, and ice. Shake the ingredients in a shaker and strain into a martini glass for a sweet and tangy cocktail.

So, there you have it! These cocktail recipes are guaranteed to shake things up and impress your guests. Whether you prefer a classic drink or something more modern, these recipes will satisfy any taste. So why not try something new and impress your friends and family with your bartending skills? Cheers!

Tips on Cocktail Presentation

Presentation is just as important as taste when it comes to cocktails. Here are some tips for making your cocktails look as good as they taste:

  1. Use fresh ingredients: Make sure to use fresh ingredients such as herbs, fruits, and garnishes to add color and freshness to your cocktail.
  2. Garnish with style: Garnishes can really make a cocktail pop. Use a variety of fruits, herbs, and even flowers to create a show-stopping presentation.
  3. Use glassware that complements the cocktail: Different cocktails call for different types of glassware. Choose glassware that complements the cocktail you’re making to enhance the overall presentation.
  4. Use colorful ingredients: Bright and bold colors can make a cocktail look more visually appealing. Consider using colorful fruits, juices, or syrups to add a pop of color to your cocktails.
  5. Don’t forget the ice: Ice can be more than just a functional ingredient in cocktails. Use ice molds or crushed ice to create interesting and visually appealing textures in your cocktails.
  6. Experiment with presentation techniques: Try using different techniques such as layering, floating, or flaming to create unique and impressive presentations for your cocktails.

By following these tips, you can make your cocktails look just as good as they taste, impressing your guests and making your drinks stand out from the crowd.

Discover Your New Favourite Cocktail with These Easy to Make Recipe

If you are ready to try new recipes and discover your new favourite cocktail then no need to delay because we’ve got some easy-to-make recipes that will have you feeling like a master mixologist in no time. You should also learn what you need to know about cocktails here

First up, let’s talk about the classic Margarita. This refreshing cocktail is perfect for a sunny day or a night in with friends. To make it, you’ll need:

  • 2 oz tequila
  • 1 oz lime juice
  • 1 oz triple sec

Simply combine all the ingredients in a shaker with ice, shake it up, and strain it into a salt-rimmed glass. If you’re feeling adventurous, try adding some fresh fruit like strawberry or mango to give it a twist!

Next, let’s dive into a cocktail that’s perfect for those who love a little sweetness in their drinks: the Cosmopolitan. Made famous by the TV shows in Home Entertainment in USA, this cocktail is a must-try. Here’s what you’ll need:

  • 1 1/2 oz vodka
  • 1 oz cranberry juice
  • 1/2 oz lime juice
  • 1/2 oz triple sec

Add all the ingredients to a shaker with ice, shake it up, and strain it into a chilled glass. Garnish with a lime wedge and you’re ready to sip away.

If you’re a gin lover, you can’t go wrong with a Classic Gin and Tonic. This simple cocktail is a staple at any bar, and for good reason. Here’s how to make it:

  • 2 oz gin
  • 4 oz tonic water
  • Lime wedge

Fill a glass with ice, add the gin, and top it off with tonic water. Squeeze a lime wedge over the top and drop it in. It’s that easy!

For those who prefer a creamy, dessert-like cocktail, the White Russian is a must-try. Here’s what you’ll need:

  • 2 oz vodka
  • 1 oz coffee liqueur
  • 1 oz heavy cream

Fill a glass with ice, add the vodka and coffee liqueur, and top it off with heavy cream. Give it a stir and enjoy the rich and decadent flavours.

Fifth on the list, let’s talk about a cocktail that’s perfect for brunch: the Mimosa. Here’s how to make it:

  • 2 oz orange juice
  • 2 oz champagne

Fill a champagne flute with orange juice and top it off with champagne. It’s a simple yet elegant cocktail that’s perfect for any occasion.

  1. Moving on to this iconic cocktail, Martini, which has been around for over a century and is a favourite of James Bond. Here’s how to make it:
  • 2 1/2 oz gin or vodka
  • 1/2 oz dry vermouth
  • Olive or lemon twist for garnish

Combine the gin or vodka and vermouth in a shaker with ice. Stir well and strain into a chilled martini glass. Garnish with an olive or a lemon twist.

  1. Introducing Manhattan! This whiskey-based cocktail has been around since the late 1800s and is a classic choice for whiskey lovers. Here’s what you’ll need:
  • 2 oz rye whiskey
  • 1 oz sweet vermouth
  • 2 dashes Angostura bitters
  • Cherry for garnish

Combine the whiskey, vermouth, and bitters in a shaker with ice. Stir well and strain into a chilled glass. Garnish with a cherry.

  1. Negroni is another delicious cocktail you must try! This Italian cocktail is a great choice for those who love bitter flavours. Here’s how to make it:
  • 1 oz gin
  • 1 oz sweet vermouth
  • 1 oz Campari
  • Orange peel for garnish

Combine all the ingredients in a shaker with ice. Stir well and strain into a chilled glass. Garnish with an orange peel.

  1. What about Sidecar? This cognac-based cocktail has a long history and is a great choice for those who love citrusy flavours. Here’s what you’ll need:
  • 2 oz cognac
  • 1 oz Cointreau or triple sec
  • 3/4 oz lemon juice
  • Sugar for rimming
  • Lemon twist for garnish

Rim a glass with sugar. Combine the cognac, Cointreau or triple sec, and lemon juice in a shaker with ice. Shake well and strain into the sugar-rimmed glass. Garnish with a lemon twist.

  1. Another fruity mix you should try is Daiquiri. This rum-based cocktail is a tropical delight. Here’s how to make it:
  • 2 oz white rum
  • 1 oz lime juice
  • 1/2 oz simple syrup

Combine all the ingredients in a shaker with ice. Shake well and strain into a chilled glass. Garnish with a lime wedge.

  1. Then, there this tequila-based cocktail, Paloma, which is light, refreshing, and perfect for summer. Here’s what you’ll need:
  • 2 oz tequila
  • 4 oz grapefruit soda
  • Juice of half a lime

Fill a glass with ice, add the tequila, grapefruit soda, and lime juice. Stir well and garnish with a lime wedge.

  1. Have you tried the Aperol Spritz? Then you’re missing a lot! This Italian cocktail is a great choice for an aperitivo(pre-meal drink) hour. Here’s how to make it:
  • 2 oz Aperol
  • 3 oz Prosecco
  • Splash of soda water
  • Orange slice

Fill a wine glass with ice, add the Aperol and Prosecco, and top it off with a splash of soda water. Stir gently and garnish with an orange slice.

There you have it, thirteen easy-to-make cocktails that are sure to become your new favourites. Whether you’re looking for something sweet, creamy, or refreshing, there’s a cocktail on this list for everyone. So grab your shaker and get ready to impress your friends with your newfound mixology skills!

Tell you what? These cocktails are all popular choices for different occasions and personal tastes. It really depends on what you’re in the mood for! If you’re looking for a refreshing drink on a hot day, the Paloma might be a good choice. If you’re in the mood for something sweet and creamy, the White Russian or the Cosmopolitan might be more up your alley. And if you’re a whiskey lover, the Gin and Tonic is a classic choice that’s hard to beat. Ultimately, the best cocktail is the one that you enjoy the most!

Black STS: The Definition of Luxury and Style

The Black STS has become a symbol of elegance and sophistication for the black community, representing their unique take on luxury and style. In this blog post, we will explore the concept of Black STS and how it redefines the traditional definition of luxury and style.

Black STS Profile

General Motors introduced the Cadillac STS (Seville Touring Sedan) in 2004 as a luxury performance sedan to replace the Cadillac Seville. The designers created the STS to rival the BMW 5 Series and the Mercedes-Benz E-Class.

The first generation of the Cadillac STS was manufactured from 2005 to 2011. Throughout this period, the car underwent several changes, making it an exciting model. In 2006, Cadillac introduced the STS-V, a high-performance version of the STS. The STS-V featured a supercharged 4.4-liter V8 engine that produced 469 horsepower. This made it one of the most powerful sedans in the market.

Two years later, in 2008, the STS received a facelift. It featured a redesigned front end with a new grille and headlights. The interior was also updated with new materials and an improved infotainment system. It included Bluetooth connectivity, satellite radio, and a hard drive for music storage.

Cadillac continued to innovate, introducing a new engine option for the STS in 2010: a 3.6-liter V6 that produced 302 horsepower. This engine replaced the previous 3.6-liter V6, which had only produced 255 horsepower. It gave the STS more power, and making it more competitive.

The second generation of the Cadillac STS was produced from 2011 to 2013. Although the STS was essentially a carryover from the previous generation, there were some minor updates. For instance, Cadillac only offered the STS with one engine option: a 3.6-liter V6 that produced 302 horsepower, which was the same as the previous generation.

Why is Black STS the Definition of Luxury and Style?

Throughout its production run, the Cadillac STS was available in different trims and configurations, including the Luxury, Performance, and Premium trims. The Luxury trim featured leather upholstery, dual-zone automatic climate control, and keyless ignition. The Performance trim came with a sport-tuned suspension, 18-inch alloy wheels, and adaptive xenon headlights. The Premium trim featured all of the above and added a sunroof, heated and ventilated front seats, and a navigation system. The company produced a limited-edition model in 2011 called the Black STS, which became the most notable variant of the STS.

Design and Style

The Black STS is a sedan that combines classic Cadillac styling with modern design elements. The car’s long, low-slung body and bold, angular lines make it look like it’s always in motion. The front end of the Black STS features a large grille with the iconic Cadillac emblem at its center, flanked by sharp, narrow headlights. The car’s profile is clean and uncluttered, with no unnecessary creases or design flourishes. The rear of the Black STS features wide, sweeping taillights that accentuate the car’s width. This adds to its aggressive stance.

The Black STS inside offers a spacious and luxurious cabin designed to provide maximum comfort and convenience. The seats are upholstered in high-quality leather, and the dashboard features a range of advanced technologies. Its features were designed to enhance the driving experience.

Performance and Handling

The 2011 Cadillac Black STS powers a 3.6-liter V6 engine that produces an impressive 302 horsepower and 272 lb-ft of torque. The six-speed automatic transmission pairs with it, providing smooth and responsive shifting.

The V6 engine provides plenty of power and acceleration. The car handles well on the road, with responsive steering and excellent maneuverability. The suspension finely tunes to provide a comfortable and smooth ride, even on rough roads.

The car’s advanced suspension system provides a smooth, comfortable ride. On the side, the precise steering and agile handling makes it a joy to drive on winding roads. The Black STS also features a range of advanced safety features, including adaptive cruise control, lane departure warning, and automatic emergency braking.

Technology

One of the standout features of the Black STS is its advanced technology. Cadillac’s CUE (Cadillac User Experience) system powers the car’s infotainment system. It was one of the most user-friendly and intuitive systems on the market during its reign. The system allows you to control everything from the car’s audio and climate settings to its navigation system and smartphone integration. The Black STS features a heads-up display that projects key driving information onto the windshield. It also has a 360-degree camera system that provides a bird’s-eye view of the car’s surroundings.

Conclusion

The Black STS is a luxury sedan that offers a winning combination of style, comfort, and performance. With its sleek design, advanced technology, and powerful engine, it’s a car that is sure to impress even the most discerning driver. And while it may come with a high price tag, the Black STS is a car that is worth every penny for those who want the best of the best in luxury sedans.

Wake Up to a Delicious Breakfast with Our Chilaquiles Recipe

Chilaquiles a delicious and satisfying breakfast that will kick-start your day because it is a traditional Mexican dish that is packed with flavor and protein. In this article, we’ll share a delicious Chilaquiles recipe that will help you wake up to a tasty and nutritious breakfast.

Ingredients:

  • 8 corn tortillas, cut into wedges
  • 2 tablespoons vegetable oil
  • 1/2 onion, chopped
  • 2 garlic cloves, minced
  • 1 can (14 oz.) diced tomatoes
  • 1/4 cup salsa
  • 1/4 cup chicken broth
  • 1 teaspoon chili powder
  • 1/2 teaspoon cumin
  • Salt and pepper, to taste
  • 2 cups cooked shredded chicken
  • 1/4 cup chopped fresh cilantro
  • 1/2 cup crumbled queso fresco
  • 2 tablespoons Mexican crema
  • 2 tablespoons chopped red onion

Instructions:

  1. Preheat the oven to 350°F.
  2. In a large skillet, heat the vegetable oil over medium heat. Add the tortilla wedges and fry until crispy, about 2-3 minutes per side. Remove the tortillas from the skillet and place them on a paper towel-lined plate.
  3. In the same skillet, add the chopped onion and garlic and sauté until softened, about 3-4 minutes.
  4. Add the diced tomatoes, salsa, chicken broth, chili powder, cumin, salt, and pepper to the skillet. Stir to combine and bring the mixture to a simmer.
  5. Add the shredded chicken to the skillet and stir to combine. Cook for about 5 minutes, or until the sauce has heated the chicken and the sauce has thickened.
  6. Add the fried tortilla wedges to the skillet and toss to coat them in the sauce.
  7. Transfer the mixture to a baking dish and bake for 10-15 minutes, or until the heated mixture is through.
  8. Remove the Chilaquiles from the oven and top with chopped cilantro, crumbled queso fresco, chopped red onion, and a drizzle of Mexican crema.
  9. Serve hot and enjoy!

The Spicy Chilaquiles

If you prefer your Chilaquiles to be spicier, there are several ways to add more heat to the recipe. Here are some options:

  1. Use spicier salsa: You can choose a salsa that has a higher heat level to add more spice to the dish. Look for salsas that use spicier chili peppers such as habanero or serrano.
  2. Add more chili powder: You can increase the amount of chili powder in the recipe to add more heat. Start with an additional 1/2 teaspoon and adjust to your taste.
  3. Use spicier cheese: Queso fresco is a mild cheese, but you can use a spicier cheese such as shredded pepper jack cheese to add more heat to the dish.
  4. Add hot sauce: You can add a few dashes of your favorite hot sauce to the recipe to add more heat. Try using a hot sauce made with habanero or ghost peppers for an extra kick.
  5. Add diced jalapeños: You can add diced jalapeños to the recipe to add more spice and texture to the dish. Be sure to remove the seeds and ribs to reduce the heat level slightly.

Remember to adjust the level of spiciness to your personal taste. Start with a small amount of spice and gradually increase it until you achieve the desired level of heat.

Side Dishes for Chilaquiles

Chilaquiles is a delicious and delightful dish with a variety of side dishes to round out the meal. Here are some common side dishes served with Chilaquiles:

  1. Refried beans: Refried beans are a classic Mexican side dish that pair well with Chilaquiles. The creamy and savory flavor of the beans complements the spicy and tangy flavors of the Chilaquiles.
  2. Rice: Rice is another common side dish served with Chilaquiles. Mexican-style rice is often flavored with tomatoes, onions, and spices, which pairs well with the bold flavors of the Chilaquiles.
  3. Guacamole: Guacamole is a creamy and flavorful dip made from mashed avocado, onions, tomatoes, and spices. It adds a refreshing and cooling element to the spicy flavors of the Chilaquiles.
  4. Pico de gallo: Pico de gallo is a fresh and chunky salsa made from diced tomatoes, onions, cilantro, and lime juice. It adds a bright and zesty flavor to the dish and can use it as a topping or side dish.
  5. Fried plantains: Fried plantains are a sweet and crispy side dish that can provide a contrast to the spicy flavors of the Chilaquiles. They are often seasoned with cinnamon and sugar and are a popular side dish in many Latin American countries.

Chilaquiles is a protean dish that you can pair with a species of side dishes to create a satisfying and flavorful meal. Whether you prefer the creamy and savory flavors of refried beans or the refreshing zing of pico de gallo, there are endless choices for creating your own unique Chilaquiles meal.

This savory and satisfying breakfast dish is easy to make and packed with flavor. Just by using high-quality ingredients and following this recipe, you can wake up to a tasty and nutritious breakfast that will keep you full and energized throughout the morning. So why not give this Chilaquiles recipe a try and start your day off on the right foot?

Experience the Flavors of Mexico with Our Authentic Chilaquiles

How much do you know about this Mexican Traditional dish? If you know so little about Chilaquiles, a traditional Mexican dish that is sure to tantalize your taste buds then this article is for you. Let’s explore the history and flavors of Chilaquiles and how you can experience them for yourself.

Chilaquiles are a classic Mexican breakfast dish that originated in central Mexico. The dish typically consists of fried corn tortilla chips that are tossed in a sauce made from tomatoes, chilies, and other seasonings. The chips are then topped with cheese, crema, and other toppings such as scrambled eggs, avocado, and cilantro.

One of the things that makes Chilaquiles so special is the variety of flavors and textures they offer. The fried tortilla chips provide a crispy and crunchy base, while the sauce adds a rich and savory flavor. The toppings add a variety of textures and flavors, from creamy avocado to tangy crema.

To experience the flavors of Mexico with authentic Chilaquiles, it’s important to use high-quality ingredients and traditional recipes. Avoid shortcuts such as using store-bought tortilla chips or sauce, as these can result in a less authentic flavor. Instead, try making your own tortilla chips and sauce using traditional recipes.

To make homemade tortilla chips, simply cut corn tortillas into wedges and fry them until crispy. For the sauce, try blending together tomatoes, chili peppers, garlic, and other seasonings to create a rich and flavorful base.

To assemble the Chilaquiles, toss the tortilla chips in the sauce until they are well coated, and then top with cheese, crema, and any other desired toppings. Serve immediately while the chips are still crispy and the flavors are fresh.

Do you want to know more? Sure, I’d be happy to tell you more about Chilaquiles and the flavors of Mexico!

Offers a variety of flavors:

One of the things that makes Chilaquiles so special is the variety of flavors they offer. The sauce can be made with a variety of ingredients, from tangy tomatillos to spicy chili peppers, and the toppings can be customized to suit your tastes.

Provides a hearty and satisfying breakfast:

This dish is a hearty and satisfying breakfast dish that can keep you full and energized throughout the morning. The combination of crispy tortilla chips, rich sauce, and flavorful toppings makes for a filling and satisfying meal.

Can be customized to suit dietary needs:

Chilaquiles can be easily customized to suit a variety of dietary needs. For example, you can make them vegetarian by omitting the meat and adding extra veggies, or you can make them gluten-free by using corn tortillas instead of wheat.

Offers a glimpse into Mexican culture:

Chilaquiles are a traditional Mexican dish that have been enjoyed for generations. By experiencing the flavours, you can gain a better understanding and it’s appreciation for Mexican culture and cuisine.

Can be enjoyed any time of day:

While Chilaquiles are traditionally a breakfast dish, they can be enjoyed any time of day. Whether you’re looking for a hearty breakfast or a satisfying dinner, Chilaquiles are a versatile and delicious option.

Toppings for Chilaquiles

Chilaquiles are a versatile dish that can be customized with a variety of toppings to suit your tastes. Here are some common toppings for this dish:

Cheese:

Cheese is a classic topping for Chilaquiles and adds a creamy and savory flavor. Traditionally, Mexican cheese such as queso fresco or cotija is used, but you can also use shredded cheddar or Monterey jack cheese.

Crema:

Crema is a tangy and slightly sour cream that adds a rich and creamy texture to it. You can use Mexican crema or sour cream as a substitute.

Avocado:

Avocado adds a creamy and buttery flavor to Chilaquiles and pairs well with the spicy and tangy sauce.

Scrambled eggs:

Scrambled eggs are a common topping for Chilaquiles and add a protein boost to the dish. You can scramble the eggs separately or cook them in the sauce for a one-pot meal.

Cilantro:

Cilantro adds a fresh and herbaceous flavor to Chilaquiles and pairs well with the other ingredients.

Diced onions:

Diced onions add a sweet and slightly crunchy texture to Chilaquiles and pair well with the spicy and tangy sauce.

Jalapeños:

Jalapeños add a spicy kick to Chilaquiles and can be diced or sliced for added texture.

Radishes:

Thinly sliced radishes add a crisp and refreshing texture to Chilaquiles and help to balance out the richness of the sauce and toppings.

There are vast choices for topping Chilaquiles, and the above list is just a starting point. You can get creative and try out different combinations of toppings to create your unique version of this delicious and satisfying dish.

Overall, Chilaquiles are a delicious and appeasing breakfast dish that offer a variety of flavors and textures. Just by using high-quality ingredients and these traditional recipes, you get to experience the flavors of Mexico in your own kitchen. So why not try making some authentic Chilaquiles for your next meal and experience dive into food ecstasy?

Upgrade Your Brunch Game with Our Mouthwatering Chilaquiles

If you’re looking for a way to take your brunch game to the next level, there’s one way in Chilaquiles because it is packed with flavour and is the perfect addition to any brunch spread. In this article, we’ll share some mouth-watering Chilaquiles recipes that are sure to impress your guests and elevate your brunch game.

  1. Corn tortillas: Corn tortillas, the base of Chilaquiles, typically cut into wedges and fried or baked until crispy.
  2. Sauce: The sauce, a key component of Chilaquiles made with a variety of ingredients such as tomatoes, chili peppers, garlic, and spices. The sauce can be red or green, depending on the ingredients used.
  3. Toppings: Toppings of Chilaquiles can be with a variety of ingredients, including cheese, crema, avocado, scrambled eggs, onions, cilantro, and salsa.
  4. Meat: You can serve Chilaquiles with a variety of meats such as shredded chicken, beef, or pork. You cook the meat in the sauce to infuse it with flavor.
  5. Beans: Refried beans are a common side dish served with Chilaquiles and can also be used as a topping.
  6. Spices: Spices such as cumin, oregano, and chili powder are commonly used to flavor the sauce and meat.

This is a versatile dish which you can garnish with a variety of ingredients to suit your tastes. Whether you prefer a spicy red sauce or a milder green sauce, there are vast possibilities for creating your own unique version of this delicious and satisfying dish.

Varieties of Chilaquiles

Chilaquiles is a versatile dish that can be customized in many ways. Here are some variations of this :

  1. Red Chilaquiles: The traditional version is made with a red sauce made from tomatoes and chili peppers. This version is often served with scrambled eggs, refried beans, and avocado.
  2. Green Chilaquiles: These are made with a green sauce made from tomatillos and chili peppers. This version is often served with grilled chicken or steak, avocado, and queso fresco.
  3. Mole Chilaquiles: These are made with a rich and flavorful mole sauce. This version is often served with shredded chicken, crema, and chopped onions.
  4. Vegetarian Chilaquiles: Make this variety by omitting the meat and adding extra veggies such as sautéed mushrooms or roasted peppers. You can serve this version with scrambled eggs, avocado, and queso fresco.
  5. Breakfast Chilaquiles: These are often served with scrambled eggs, refried beans, and avocado. This version is a popular breakfast dish in Mexico and one can enjoy it with a cup of coffee or hot chocolate.
  6. Seafood Chilaquiles: This type is made with shrimp or fish and you can serve it with a spicy chipotle sauce. This version is popular in coastal regions of Mexico.
  7. Sweet Chilaquiles: Making this version is omitting the chili peppers and adding a sweet sauce made from cinnamon, sugar, and vanilla. This version is often served with fresh fruit and whipped cream.

Chilaquiles Recipes

Chilaquiles is a traditional Mexican dish that typically consists of fried or baked corn tortilla chips that are tossed in a sauce and topped with a variety of ingredients. Here are some common ingredients used in different ways:

Classic Chilaquiles Ingredients:

  • 8 corn tortillas, cut into wedges
  • 2 tablespoons vegetable oil
  • 1/2 onion, chopped
  • 2 garlic cloves, minced
  • 1 can (14 oz.) diced tomatoes
  • 1/4 cup salsa
  • 1/4 cup chicken broth
  • 1 teaspoon chili powder
  • 1/2 teaspoon cumin
  • Salt and pepper, to taste
  • 2 cups cooked shredded chicken
  • 1/4 cup chopped fresh cilantro
  • 1/2 cup crumbled queso fresco
  • 2 tablespoons Mexican crema
  • 2 tablespoons chopped red onion

Instructions:

Follow the instructions outlined in the “Wake up to a Delicious Breakfast with this Chilaquiles Recipe” article.

Breakfast Chilaquiles Ingredients:

  • 8 corn tortillas, cut into wedges
  • 2 tablespoons vegetable oil
  • 1/2 onion, chopped
  • 2 garlic cloves, minced
  • 1 can (14 oz.) diced tomatoes
  • 1/4 cup salsa
  • 1/4 cup chicken broth
  • 1 teaspoon chili powder
  • 1/2 teaspoon cumin
  • Salt and pepper, to taste
  • 4 large eggs, beaten
  • 1/2 cup shredded cheddar cheese
  • 2 tablespoons chopped fresh cilantro
  • 2 tablespoons chopped green onions

Instructions:

Firstly, Follow the instructions outlined in the “Wake up to a Delicious Breakfast with this Chilaquiles Recipe” article, but omit the shredded chicken.

Then, in a separate skillet, scramble the eggs until cooked through.

Top the Chilaquiles with scrambled eggs, shredded cheddar cheese, chopped cilantro, and green onions.

Serve hot and enjoy!

Vegetarian Chilaquiles Ingredients:

  • 8 corn tortillas, cut into wedges
  • 2 tablespoons vegetable oil
  • 1/2 onion, chopped
  • 2 garlic cloves, minced
  • 1 can (14 oz.) diced tomatoes
  • 1/4 cup salsa
  • 1/4 cup vegetable broth
  • 1 teaspoon chili powder
  • 1/2 teaspoon cumin
  • Salt and pepper, to taste
  • 1 can (14 oz.) black beans, drained and rinsed
  • 1/4 cup chopped fresh cilantro
  • 1/2 cup crumbled queso fresco
  • 2 tablespoons Mexican crema
  • 2 tablespoons chopped red onion

Instructions:

Firstly, follow the instructions outlined in the “Wake up to a Delicious Breakfast with this Chilaquiles Recipe” article, but omit the shredded chicken.

Then, add the black beans to the skillet with the sauce and cook until heated through.

Top it with the black beans, chopped cilantro, crumbled queso fresco, chopped red onion, and a drizzle of Mexican crema.

Serve hot and enjoy!

Now you know that Chilaquiles is a versatile dish that can you can customize in many ways. Whether you prefer a spicy red sauce or a sweet cinnamon sauce, there is a variety to suit your tastes. With these mouth-watering Chilaquiles recipes, you can impress your guests, take your brunch game to the next leveland add some Mexican flair to your next brunch. You should try out different variations and discover your favourite version of this delicious and satisfying dish.

Impress Your Guests with Our Easy and Delicious Chilaquiles Recipe

If you’re looking for an impressive and delicious dish to serve your guests, look no further than Chilaquiles. This classic Mexican dish is easy to make, yet packed with bold flavors and textures that are sure to impress. In this article, we’ll share an easy and delicious Chilaquiles recipe that is sure to be a hit with your guests.

Ingredients:

  • 8 corn tortillas, cut into wedges
  • 2 tablespoons vegetable oil
  • 1/2 onion, chopped
  • 2 garlic cloves, minced
  • 1 can (14 oz.) diced tomatoes
  • 1/4 cup salsa
  • 1/4 cup chicken broth
  • 1 teaspoon chili powder
  • 1/2 teaspoon cumin
  • Salt and pepper, to taste
  • 2 cups cooked shredded chicken
  • 1/4 cup chopped fresh cilantro
  • 1/2 cup crumbled queso fresco
  • 2 tablespoons Mexican crema
  • 2 tablespoons chopped red onion

Instructions:

  1. Preheat the oven to 350°F.
  2. In a large skillet, heat the vegetable oil over medium heat. Add the tortilla wedges and fry until crispy, about 2-3 minutes per side. Remove the tortillas from the skillet and place them on a paper towel-lined plate.
  3. In the same skillet, add the chopped onion and garlic and sauté until softened, about 3-4 minutes.
  4. Add the diced tomatoes, salsa, chicken broth, chili powder, cumin, salt, and pepper to the skillet. Stir to combine and bring the mixture to a simmer.
  5. Add the shredded chicken to the skillet and stir to combine. Cook for about 5 minutes, or until the chicken is heated through and the sauce has thickened.
  6. Add the fried tortilla wedges to the skillet and toss to coat them in the sauce.
  7. Transfer the mixture to a baking dish and bake for 10-15 minutes, or until the Chilaquiles are heated through.
  8. Remove the Chilaquiles from the oven and top with chopped cilantro, crumbled queso fresco, chopped red onion, and a drizzle of Mexican crema. Serve and enjoy!

Common Tortilla-mistakes.

Tortillas can become soggy if they are not prepared or cooked properly, which can affect the overall texture and flavor of the dish. Here are some common mistakes that can make tortillas soggy:

  1. Overcrowding the pan: When frying tortillas or any food, it’s important not to overcrowd the pan. If too much food is added at once, it will cause the temperature of the oil to drop, resulting in soggy and greasy tortillas.
  2. Using too much oil: Using too much oil can also cause the tortillas to become soggy. Excess oil can seep into the tortillas, making them greasy and heavy.
  3. Using fresh tortillas: Fresh tortillas are more moist than stale tortillas, which can make them absorb more oil and become soggy. It’s best to use stale tortillas or to leave fresh tortillas out to dry for a few hours before using them.
  4. Not draining excess oil: Once the tortillas are fried, it’s important to remove them from the oil and place them on a paper towel-lined plate to drain any excess oil. Failure to do so can cause the tortillas to become soggy and greasy.
  5. Adding wet ingredients too early: If you add wet ingredients such as salsa or sauce to the tortillas too early, it can cause them to become soggy. Wait until just before serving to add the wet ingredients to ensure that the tortillas stay crispy.

By avoiding these common mistakes, you can ensure that your tortillas remain crispy and delicious in your Chilaquiles dish.

Tortilla in Varieties and Styles

Tortillas are a versatile ingredient that can be used in a variety of dishes, both traditional Mexican dishes and fusion cuisines. Here are some other dishes that use tortillas:

  1. Tacos: Tacos are a popular Mexican dish that feature a tortilla wrapped around various fillings, such as meat, beans, cheese, and vegetables.
  2. Enchiladas: Enchiladas are another classic Mexican dish that feature tortillas filled with meat, cheese, or vegetables and then rolled up and topped with sauce and cheese.
  3. Quesadillas: Quesadillas are a simple and delicious dish that feature tortillas filled with cheese and other ingredients, such as chicken, vegetables, or beans, and then grilled or fried until crispy.
  4. Tostadas: Tostadas are a crispy tortilla topped with various ingredients such as refried beans, meat, cheese, lettuce, and tomatoes.
  5. Burritos: Burritos are a popular Mexican dish that feature a large tortilla wrapped around various fillings, such as rice, beans, meat, cheese, and vegetables.
  6. Nachos: Nachos are a popular snack or appetizer that feature tortilla chips topped with cheese, meat, beans, and other toppings.
  7. Breakfast burritos: Breakfast burritos are a popular breakfast dish that feature a tortilla wrapped around scrambled eggs, cheese, and other breakfast ingredients such as bacon, sausage, or potatoes.

The Preservation Method

Homemade tortillas can be stored for up to 5 days if stored properly. The best way to store homemade tortillas is to wrap them in a clean kitchen towel or place them in an airtight container and store them in the refrigerator. Here are some tips for storing homemade tortillas:

  1. Let them cool completely: Allow the tortillas to cool completely before storing them. This will prevent moisture from building up and making them soggy.
  2. Wrap them in a towel or store them in an airtight container: Wrap the tortillas in a clean kitchen towel or place them in an airtight container to prevent them from drying out or absorbing odors from the fridge.
  3. Refrigerate: Store the tortillas in the refrigerator for up to 5 days. If you need to store them for longer, you can freeze them for up to 3 months.
  4. Reheat before serving: To reheat the tortillas, wrap them in a damp paper towel and microwave for 10-15 seconds or until warm. Alternatively, you can reheat them in a dry skillet over medium heat for 10-15 seconds on each side.

By following these tips, you can store homemade tortillas for up to 5 days and ensure they stay fresh and delicious.

Overall, tortillas are a versatile ingredient that can be used in a wide variety of dishes, making them a pantry staple in many households.

This easy and delicious Chilaquiles recipe is sure to impress your guests with its bold flavors and textures. By using high-quality ingredients and following these simple instructions, you can create a memorable and impressive dish that your guests will love. So why not give this Chilaquiles recipe a try and impress your guests with your culinary skills?